


Want to publish more polished blog posts?
Looking for free or low-budget tools to help?
In this article, you’ll discover three blogging tools that will help you catch typos and improve readability of your blog posts.
#1: After the Deadline
After the Deadline can be best summarized as a “language checker for the web.” This free tool offers contextual spell checking, advanced style checking, and intelligent grammar checking.
Many spell-check tools seem oddly ignorant of any contextual relevance for words. After the Deadline stands out from the competition by using artificial intelligence to look at context and make an appropriate recommendation.
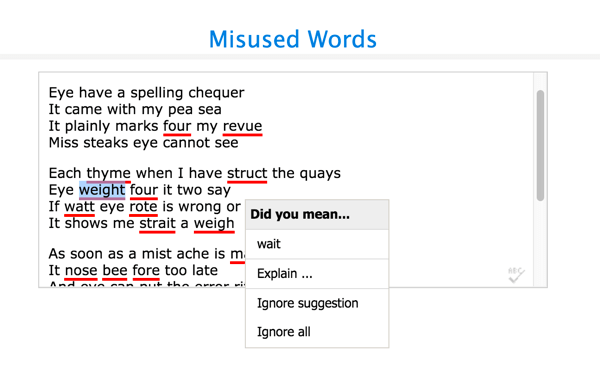
It’s not just an editing tool, though. It can also help you avoid the common mistake where you use one word when you meant to use another. With a database of over 1,500 of the most commonly misused words, it checks that the words you’re using fit with the surrounding text and suggests words that may work better.

While misspelling and misusing words are certainly issues, how you write is just as important as what you write. Clarity and brevity are the order of the day for blogging, something that After the Deadline seems to understand perfectly.
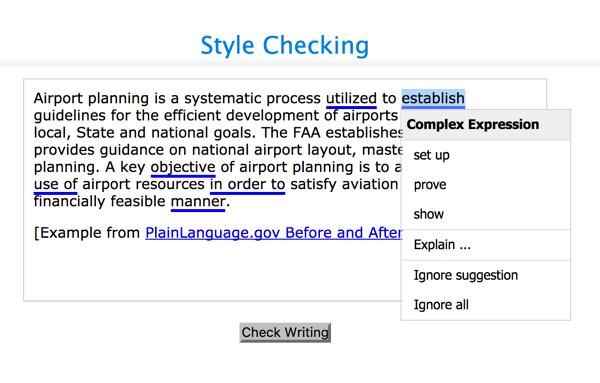
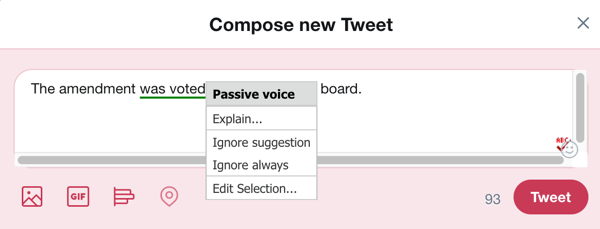
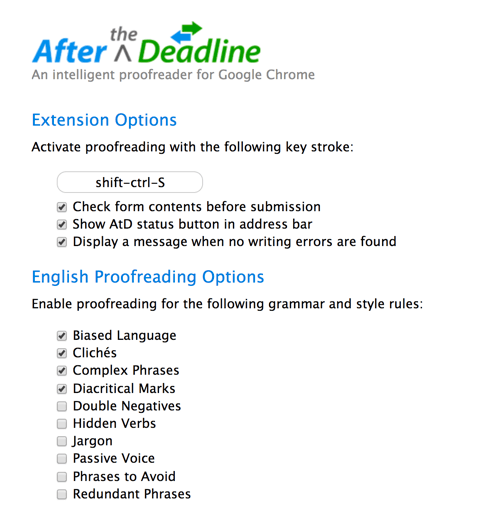
The style checker has thousands of rules and relies on context to make an appropriate suggestion. Among other things, it makes a point to identify complex phrases and suggest simpler ones, flag passive voice, and find clichés and biased language in your blog posts.

Whether you’re tech-savvy or not, After the Deadline has an installation option for you. It’s available as a WordPress plugin, Google Chrome extension, and OpenOffice extension.
To keep things simple, we’ll focus on the most straightforward option: the Google Chrome extension. Click Add to Chrome to install the extension and automatically enable it in your web browser.
From now on, most text-focused boxes will look like the example below. To proofread your content, click the ABC icon in the bottom-right corner or use the designated shortcut (Ctrl+Shift+S, by default). If you don’t see the ABC icon in a text box, you can’t use the tool to proofread your text.
If the tool finds a potential issue with your text, it flags the word with a colored underline (red for spelling, green for grammar, and blue for style). Click the underlined text to see a pop-up menu with suggestions.

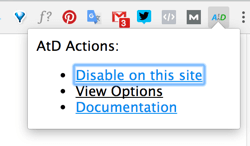
To change the keyboard shortcut or other tool settings, click the After the Deadline icon in your browser toolbar and choose View Options.

Then enable or disable options to customize the tool for your needs.

#2: Clarity Jargon Buster
Clarity Jargon Buster helps you identify and eliminate jargon from your blog posts. The tool was designed to calculate a jargon-density score, which is the number of buzzwords found divided by the total number of words in your text.
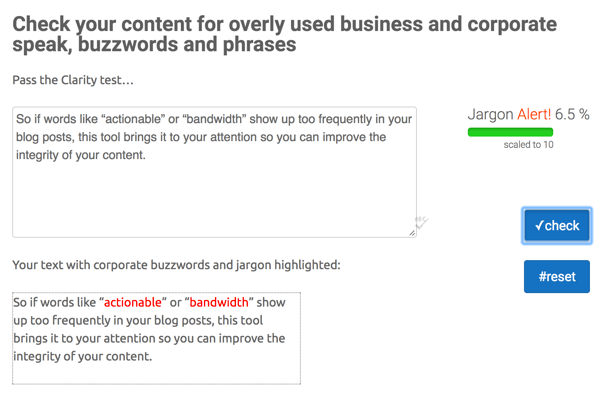
You can use this tool to find jargon not only in your marketing content, but also in white papers, brochures, and any other business content. It relies on its own jargon dictionary of 800+ words, focusing on the overused professional lingo. So if words like “actionable” or “bandwidth” show up too frequently in your blog posts, this tool brings it to your attention so you can improve the integrity of your content.
To check your text, paste your content into the text box and click the Check button. The tool then calculates a jargon-density score and lists the buzzwords it identifies.

You don’t need to install anything to use Clarity Jargon Buster’s free online tool, which lets you check up to 800 words of text at a time. If your posts are on the shorter side, the free version should work well for your needs. If you’re creating long-form content or want the full experience, you can buy access for as little as $2.99 per year.
#3: Grammar Checker
Grammar Checker offers one of the most in-depth spelling and grammar check services available. It’s an online tool that’s free to use and surprisingly thorough. You can use it to check entire blog posts. From common mistakes to complex, nuanced errors, it is designed to let you fix multiple mistakes with one click.
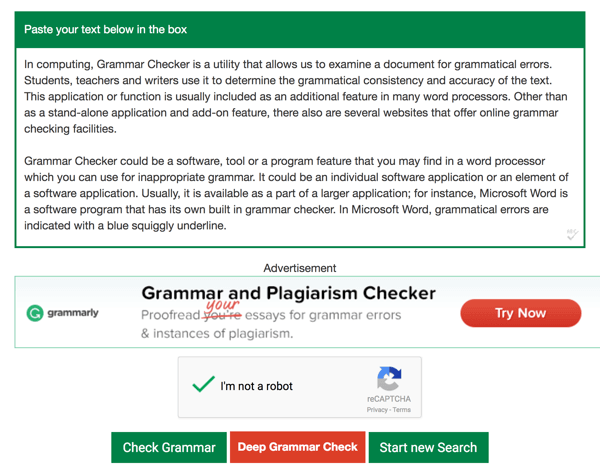
To use this tool, paste your text into the text box at the top of the page. Then select the check box to prove you’re not a robot and click Check Grammar. If you see a pop-up box, click OK to submit your text for review.

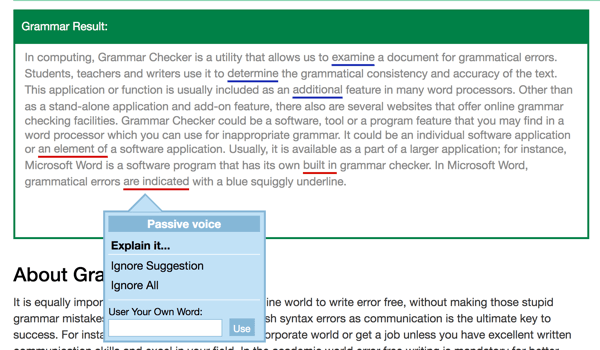
The tool will then check your spelling, flag potential errors in your writing, and suggest changes to improve your content. Click underlined text to see why it was flagged and view recommendations. You can then accept the suggested change, type in your own word, or ignore the suggestion.

Conclusion
Time is money, and your business invests a lot of time and effort into creating valuable content for your blog. However, if your posts are full of typos and grammatical errors, it weakens the credibility of your blog and your content.
The three tools above can help you check your writing for potential errors and offer suggestions for improving your posts, maximizing the effectiveness of your content.
Source: Social Media Examiner